Blocking, and The Sleeves.
 MY YARN CABINET VOMITED
 BUT REMEMBER HOW GORGEOUS THE SNOW WAS ON MONDAY?
Dear Blog-
Although on one hand it would have made a great deal of sense to sew on the sleeves before taking on the neckline and button bands, on the other hand, leaving them til last gave me a LOT less bulk to deal with while I was working on the other sections. You know, there is only so much room in a chair, and I take up most of it. Those sleeves can wait their turn.
After finally finishing the button bands on Friday evening, I joyfully skipped over to the washing machine to begin blocking my sweater. I like to fill the washer tub (without the sweater in it) on a gentle cycle to a low water setting with a dash of Dawn dish liquid in it. First, because of asthma, I need to get rid of any vestiges of lanolin. Second, because of asthma, I can't use any of the wool washes that contain Essential Oils or other fragrances. After all, we had to close our Aromatherapy business because of my asthma. So a dash of Dawn it is. Once the machine has filled, I put the sweater in and let it swish for about 20-30 seconds. Then I open the machine again to stop the agitation, and set the kitchen timer for anywhere from 20-30 minutes to let the thing soak for a bit and relax. Somewhere I read that some wise person said that the whole point of blocking is to remind the yarn what you want it to do. Before you ca whip it into shape, it helps to weaken it's defenses.
After it soaks, I pull the sopping wet thing out of the machine, and set the machine cycle forward so that the soapy water spins out and the tub refills with clean water. Once it has done so, I put the sweater back in, and again let it agitate for about 20 seconds. Soak some more, then send it through the spin cycle. I pull out a nice, limp and amenable pile of knitting that is now ready to do anything I tell it to do.
In the meantime I have pulled my old blocking towels out of the linen closet and have them all set up on the dining room table, two layers deep, along with my blocking wires, yard stick and T-pins.
Now is my chance to mold it in to whatever shape I require. I like to start by loosely laying the sweater out on the towels and getting it into some sort of vague order, next taking out the blocking wires and setting them around on the sweater where I am going to use them. I like to run a wire along each area where I want a straight edge, such as hems, button bands, etc. Once I have strung these planes all through with the wires, I next measure between certain points to make sure that everything is even, say between the button band and the edge of the armhole on the right, then the same spot on the left, and make sure I come up with the same measurements on both sides. If I need it to be wider on one side, I can gently stretch the knitting on that side to fit. If I need it to be narrower I can gently massage the piece into place. Once it is the right measurement, I pin the wire down with my T-pins.
If I have cables I will use my fingers to gently lift the cables so that they show to the best advantage. With ribbing I will 'comb' the ribbing with my fingers to coax it into straight parallel lines.
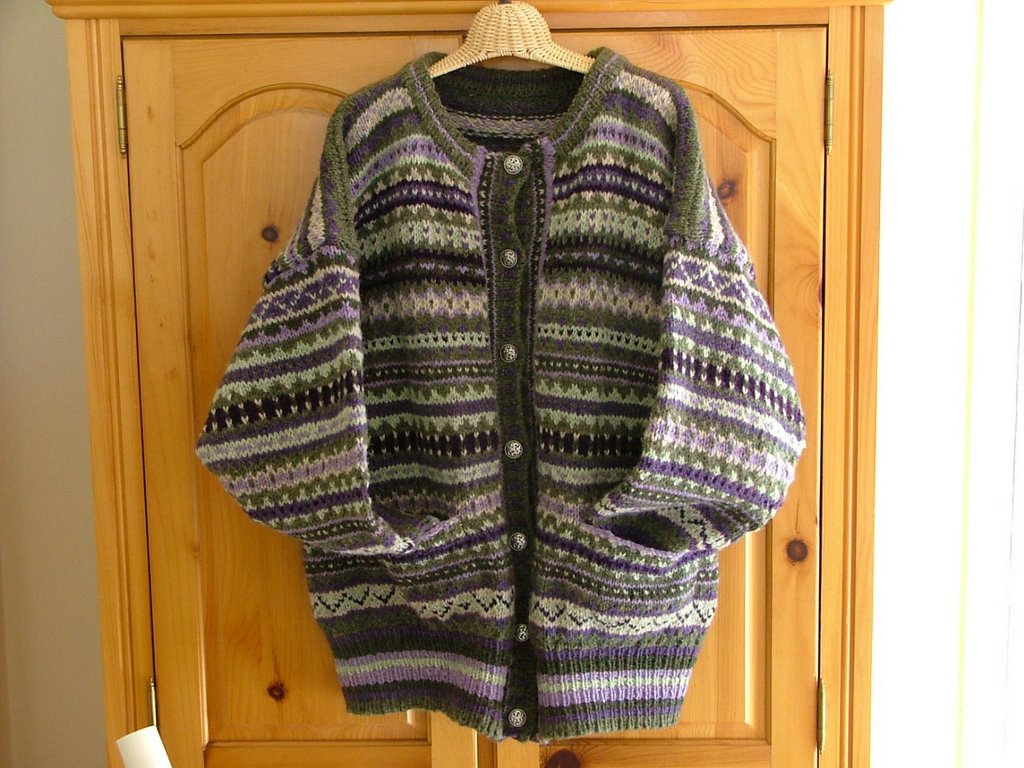
Here is my sweater the next morning after drying overnight, with the wires still in to show where I have placed them.
Although on one hand it would have made a great deal of sense to sew on the sleeves before taking on the neckline and button bands, on the other hand, leaving them til last gave me a LOT less bulk to deal with while I was working on the other sections. You know, there is only so much room in a chair, and I take up most of it. Those sleeves can wait their turn.
After finally finishing the button bands on Friday evening, I joyfully skipped over to the washing machine to begin blocking my sweater. I like to fill the washer tub (without the sweater in it) on a gentle cycle to a low water setting with a dash of Dawn dish liquid in it. First, because of asthma, I need to get rid of any vestiges of lanolin. Second, because of asthma, I can't use any of the wool washes that contain Essential Oils or other fragrances. After all, we had to close our Aromatherapy business because of my asthma. So a dash of Dawn it is. Once the machine has filled, I put the sweater in and let it swish for about 20-30 seconds. Then I open the machine again to stop the agitation, and set the kitchen timer for anywhere from 20-30 minutes to let the thing soak for a bit and relax. Somewhere I read that some wise person said that the whole point of blocking is to remind the yarn what you want it to do. Before you ca whip it into shape, it helps to weaken it's defenses.
After it soaks, I pull the sopping wet thing out of the machine, and set the machine cycle forward so that the soapy water spins out and the tub refills with clean water. Once it has done so, I put the sweater back in, and again let it agitate for about 20 seconds. Soak some more, then send it through the spin cycle. I pull out a nice, limp and amenable pile of knitting that is now ready to do anything I tell it to do.
In the meantime I have pulled my old blocking towels out of the linen closet and have them all set up on the dining room table, two layers deep, along with my blocking wires, yard stick and T-pins.
Now is my chance to mold it in to whatever shape I require. I like to start by loosely laying the sweater out on the towels and getting it into some sort of vague order, next taking out the blocking wires and setting them around on the sweater where I am going to use them. I like to run a wire along each area where I want a straight edge, such as hems, button bands, etc. Once I have strung these planes all through with the wires, I next measure between certain points to make sure that everything is even, say between the button band and the edge of the armhole on the right, then the same spot on the left, and make sure I come up with the same measurements on both sides. If I need it to be wider on one side, I can gently stretch the knitting on that side to fit. If I need it to be narrower I can gently massage the piece into place. Once it is the right measurement, I pin the wire down with my T-pins.
If I have cables I will use my fingers to gently lift the cables so that they show to the best advantage. With ribbing I will 'comb' the ribbing with my fingers to coax it into straight parallel lines.
Here is my sweater the next morning after drying overnight, with the wires still in to show where I have placed them.
 You can see that I have a long wire going horizontally across the shoulders. Other horizontal planes are fixed in place with another long wire across the back of the hem, with two short wires on either side of the fronts at the hem, and two short wires at the tops of the pocket edges.
Vertical wires are at the side edges running from hem up into the armhole, through each of the light purple bands at the button bands, and at the edges of the button bands. Get it where you want it, and pin those puppies down until it dries.
Now I can deal with the armholes and sleeves. You've guessed by now that I don't want raw, cut edges to show anywhere in the finished garment. So again, after reading the great tips on the kidsknit.com website that I pointed you to yesterday, I went back and added 3 rows of purl (plus the 4th bind off row) to the tops of my sleeves. Do over? I would make it 5 rows and leave those stitches live on a piece of waste yarn as I did for the neckline.
Next, from the outside, I pinned and sewed my sleeves into place using mattress stitch, at the last knit row before I started the purl rows. After the sleeves were set in, I then turned the garment inside out and turned those purl rows to the inside and sewed them down as a facing over the cut edges and to the loops of my stitches that were formed when I mattress stitched the sleeves into the garment. Voila, no cut edges here, either.
 INSIDE OF SLEEVE WHERE IT JOINS THE BODY
So there you go. All that was left was to sew on the buttons, and the beast was finished!
In the meantime, Dear Blog, I have been swatching away for a new bag pattern that I am working on. I am also one leeeetle square from finished on the second Argosy scarf. I could go back and rip it down one tier before starting my finishing tiers, but I don't wanna. The tail end of the yarn is a gorgeous turquoise and I don't want to lose an inch of it. This is why the yarn cabinet vomited. I stuck my hands down its throat looking for more Noro, and kind of Noro, with that color of turquoise, and I found some. Today I hope to finish out the Argosy and start on the new bag, writing the pattern as I work. Oh, and I'm also making Emilie's Hooded Scarf from Green Mountain Spinnery. But we'll talk about all that next time. The dirty dishes are calling.
Lynda
Lynda
posted by Lynda Michaluk Sorenson at 10:25 AM
![]()
![]()

2 Comments:
What a cleaver idea using wire. I will definitely try that on my next project. Thanks for the idea.
Your beast is beautiful!
Post a Comment
<< Home