Button Bands!
Dear Blog-
 Shoulders finished with a three-needle bind off, neckline done and sewn into place inside, and the pockets finished. Time to move on to the button bands.
This was the stage that took me the longest to do, mostly because I wasn't entirely certain how I would finish the bands. As with steeks, take my advice and make these decisions before beginning your project. Had I done so I would have had several more options. And although I like my final result very much, more options are a good thing. Again I felt that the directions offered in the kit were not terribly detailed and helpful. Since I already knew I wanted to do something different this wasn't such an issue for me, but it might be for others.
I knew that I wanted to use the method of picking up sts from both sides of the cut edge in order to close in those cut ends. I knew I wanted to work a single peerie next as a decorative touch. But what the heck to do with the part where the buttons and buttonholes go?
I began with what I knew and dove in. Using the method described in the kidsknits.com Intro to Steeks and using the light lavender yarn, I picked up sts along the front edge on the outside of the garment's left side. Here is where the buttons will go, and this allows me to figure button placement before figuring buttonhole placement. Following her directions instead of following some cast-in-concrete magic formula for picking up sts, I picked up sts according to the st/row gauge I was getting in the fabric of the body tube, using a needle (US11) three times larger than was used in the knitting of the body (US8). For me this meant picking up 8 sts for every 9 rows of body fabric. Once I had picked up my sts, I then switched to the size 8 needle, and worked one purl row, then a knit row, making a total of 3 stockinette rows.
Next, from the inside of the edge using a second size 8 needle and the medium lavender yarn (same color combination I used in the neckline treatment), I picked up the loops created by the light lavender yarn when picking up for the outside of the garment, increasing one st to compensate for the fact that my light lavender loops were from the spaces between the outside picked-up sts, and so are one st short. I again purled one row and knitted the next, making for a total of three stockinette stitch rows.
Once these two sections are knitted, one needle full of inside sts and one needle full of outside sts are held together just as one would do when working a three-needle bind off, and are knitted together with a third needle - without binding off. Switching to the color of yarn used in the first row of my peerie, this joins the two sections - front and back - together and seals those cut yarn ends into their own little closed space. I then worked my peerie in dark green and white, finishing with the light lavender edge row.
The effect of knitting these two sections together over the cut edges also gives a raised line, what the originator of the idea calls a trapunto effect, and gives body and emphasis to the edge treatment.
So far so good, but what to do with the area where the buttons and buttonholes will go? It can't be worked in stockinette because it will be too light in weight and will curl. It can't be worked in stockinette and doubled under because that weight would be too heavy for the peerie next to it, and require a smaller needle which then changes gauge. It can't be worked in ribbing because I would have to switch down to a smaller needle here as well to make the ribbing look neater and that would also make a slight gauge change. It could be worked in garter or seed stitch, and yet those are used nowhere else in the garment. In the end I did decide to go with the corrugated ribbing in a 2x2 rib, using the medium green for the knits, and the medium lavender for the purls.
My first effort curled terribly and had to be ripped out. A little more research led me to work the last row and the bind off row in seed stitch. Problem solved. I have since seen another hint that changing the ribbing to a 2x3 rib also solves the curling problem.
After working that first side I took a good look at it again. I'm not keen on the fact that skipping every 9th st on the pick up does sometimes leave a tiny gap there. I continued on with the idea of perhaps throwing in a duplicate st in the light lavender in those spaces if needed, but since blocking I have found that the spaces mostly disappear. However I forestalled this on the second side by picking up in every row, and then decreasing on every 8th st. The decrease is slightly visible but a better solution to the issue. With lighter weight yarns and smaller needles this gap would not be as much of an problem, as the result would be that much more subtle.
I laid the sweater out flat and started playing with button placement on the corrugated ribbing band. Finally I decided that placing a button on every 5th purl area of the corrugated ribbing not only gave me a nice button placement, but made one heck of a handy way to know when to work the buttonholes on the second side. Since the corrugated ribbing was worked in four rows. I worked my two-stitch buttonholes in the second and third rows of the ribbing, finishing off with the two rows of seed st as on the first side.
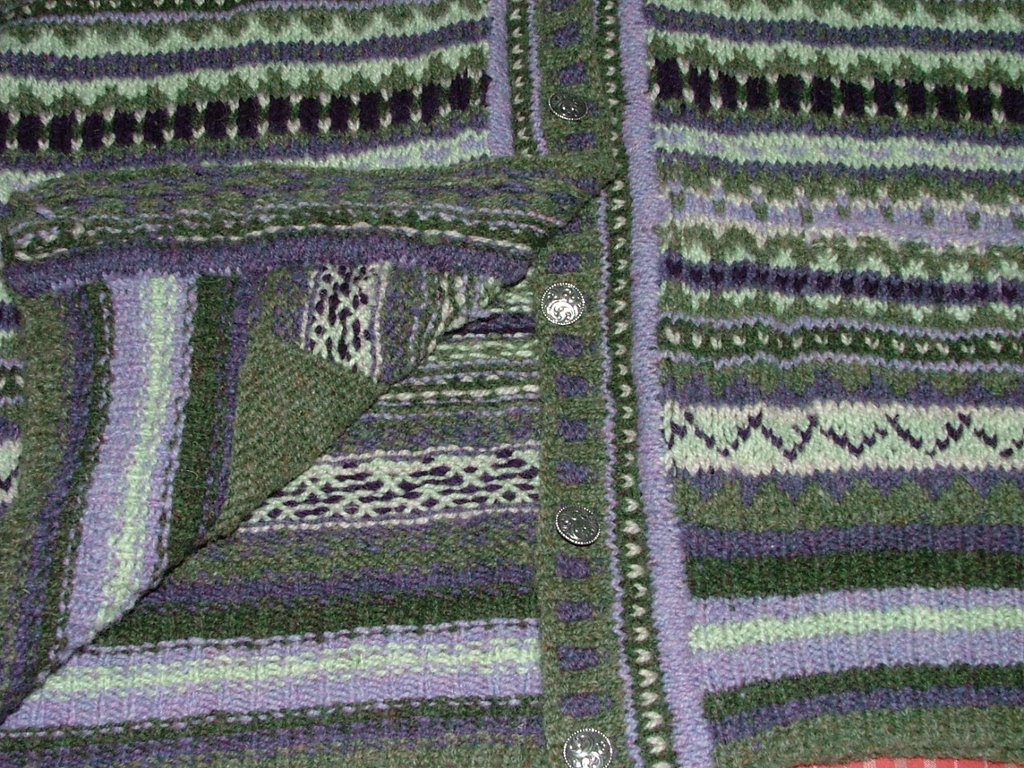
Here is the final result, showing the light lavender band that picks up the outer edge of the cut steek, and the medium lavender band that closes those cut sts off from the inside. This technique makes for a very neat finish, and the result also makes my sweater different from other PW sweaters out there wandering in the world.

Time for breakfast. Tomorrow we deal with sleeves. Doesn't that sound exciting?
Lynda
It is another cold, frosty morning out there. You will need to be content with that bit of knowledge and not require photographic proof because it is too danged cold to go out there. Take my word for it, lots of heavy frost.
Ok, so yesterday when we left our sweater, we were here:
Ok, so yesterday when we left our sweater, we were here:
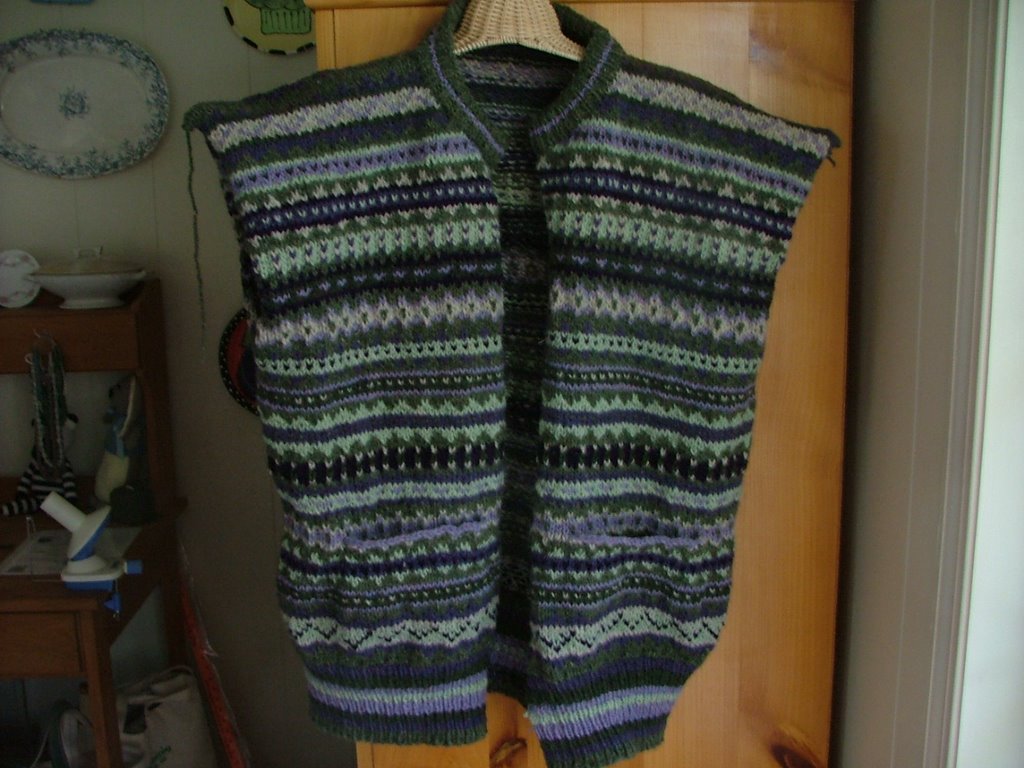 Shoulders finished with a three-needle bind off, neckline done and sewn into place inside, and the pockets finished. Time to move on to the button bands.
This was the stage that took me the longest to do, mostly because I wasn't entirely certain how I would finish the bands. As with steeks, take my advice and make these decisions before beginning your project. Had I done so I would have had several more options. And although I like my final result very much, more options are a good thing. Again I felt that the directions offered in the kit were not terribly detailed and helpful. Since I already knew I wanted to do something different this wasn't such an issue for me, but it might be for others.
I knew that I wanted to use the method of picking up sts from both sides of the cut edge in order to close in those cut ends. I knew I wanted to work a single peerie next as a decorative touch. But what the heck to do with the part where the buttons and buttonholes go?
I began with what I knew and dove in. Using the method described in the kidsknits.com Intro to Steeks and using the light lavender yarn, I picked up sts along the front edge on the outside of the garment's left side. Here is where the buttons will go, and this allows me to figure button placement before figuring buttonhole placement. Following her directions instead of following some cast-in-concrete magic formula for picking up sts, I picked up sts according to the st/row gauge I was getting in the fabric of the body tube, using a needle (US11) three times larger than was used in the knitting of the body (US8). For me this meant picking up 8 sts for every 9 rows of body fabric. Once I had picked up my sts, I then switched to the size 8 needle, and worked one purl row, then a knit row, making a total of 3 stockinette rows.
Next, from the inside of the edge using a second size 8 needle and the medium lavender yarn (same color combination I used in the neckline treatment), I picked up the loops created by the light lavender yarn when picking up for the outside of the garment, increasing one st to compensate for the fact that my light lavender loops were from the spaces between the outside picked-up sts, and so are one st short. I again purled one row and knitted the next, making for a total of three stockinette stitch rows.
Once these two sections are knitted, one needle full of inside sts and one needle full of outside sts are held together just as one would do when working a three-needle bind off, and are knitted together with a third needle - without binding off. Switching to the color of yarn used in the first row of my peerie, this joins the two sections - front and back - together and seals those cut yarn ends into their own little closed space. I then worked my peerie in dark green and white, finishing with the light lavender edge row.
The effect of knitting these two sections together over the cut edges also gives a raised line, what the originator of the idea calls a trapunto effect, and gives body and emphasis to the edge treatment.
So far so good, but what to do with the area where the buttons and buttonholes will go? It can't be worked in stockinette because it will be too light in weight and will curl. It can't be worked in stockinette and doubled under because that weight would be too heavy for the peerie next to it, and require a smaller needle which then changes gauge. It can't be worked in ribbing because I would have to switch down to a smaller needle here as well to make the ribbing look neater and that would also make a slight gauge change. It could be worked in garter or seed stitch, and yet those are used nowhere else in the garment. In the end I did decide to go with the corrugated ribbing in a 2x2 rib, using the medium green for the knits, and the medium lavender for the purls.
My first effort curled terribly and had to be ripped out. A little more research led me to work the last row and the bind off row in seed stitch. Problem solved. I have since seen another hint that changing the ribbing to a 2x3 rib also solves the curling problem.
After working that first side I took a good look at it again. I'm not keen on the fact that skipping every 9th st on the pick up does sometimes leave a tiny gap there. I continued on with the idea of perhaps throwing in a duplicate st in the light lavender in those spaces if needed, but since blocking I have found that the spaces mostly disappear. However I forestalled this on the second side by picking up in every row, and then decreasing on every 8th st. The decrease is slightly visible but a better solution to the issue. With lighter weight yarns and smaller needles this gap would not be as much of an problem, as the result would be that much more subtle.
I laid the sweater out flat and started playing with button placement on the corrugated ribbing band. Finally I decided that placing a button on every 5th purl area of the corrugated ribbing not only gave me a nice button placement, but made one heck of a handy way to know when to work the buttonholes on the second side. Since the corrugated ribbing was worked in four rows. I worked my two-stitch buttonholes in the second and third rows of the ribbing, finishing off with the two rows of seed st as on the first side.
Here is the final result, showing the light lavender band that picks up the outer edge of the cut steek, and the medium lavender band that closes those cut sts off from the inside. This technique makes for a very neat finish, and the result also makes my sweater different from other PW sweaters out there wandering in the world.
Time for breakfast. Tomorrow we deal with sleeves. Doesn't that sound exciting?
Lynda
posted by Lynda Michaluk Sorenson at 7:23 AM
![]()
![]()

2 Comments:
Lynda,
A most informative description of your thought process. I learned a good bit, thinking the process along with you.
Cool, I will now proceed with caution adding this method to my arsenal :)
Erica
Ohhh how pretty, I really like your sweater, it is sooo nicely knit.:)
Post a Comment
<< Home