Monday, January 29, 2007

Colour!


SUNSHINE ON THE FRINGE OF MY ELEMENTS SHAWL

Dear Blog-

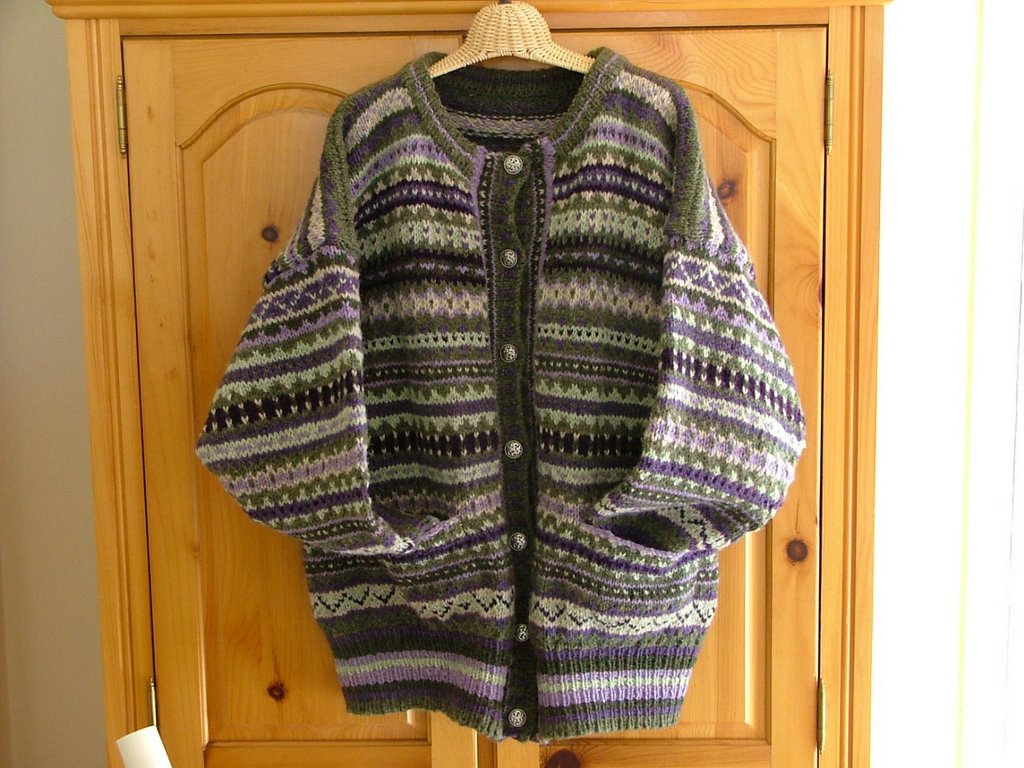
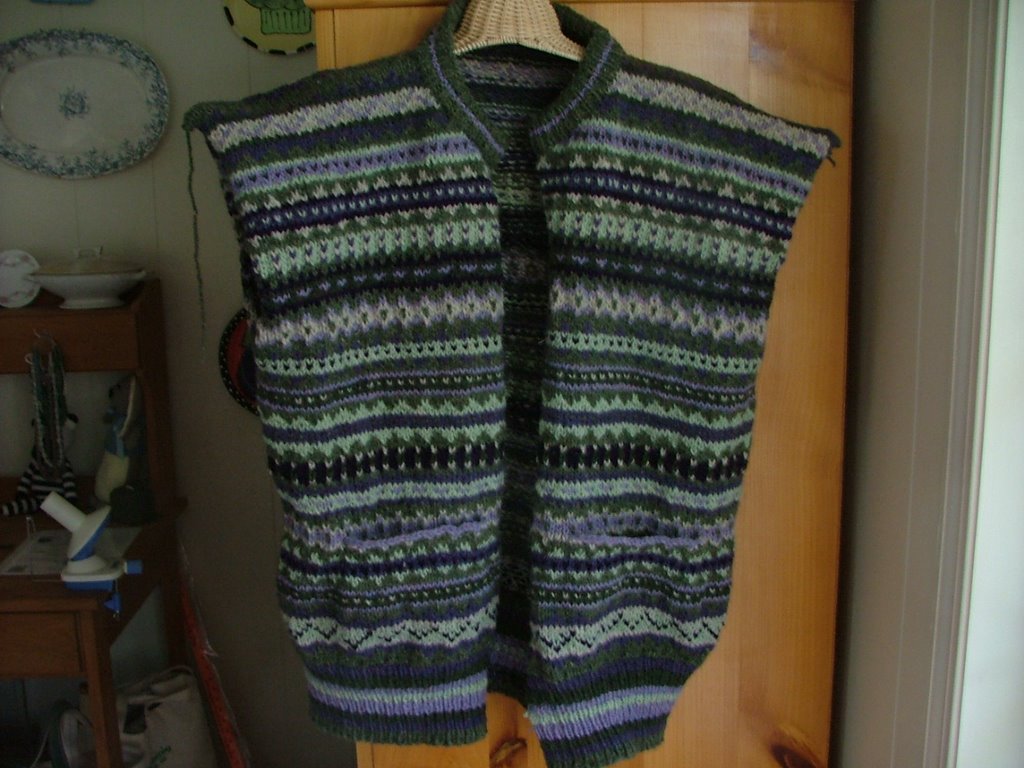
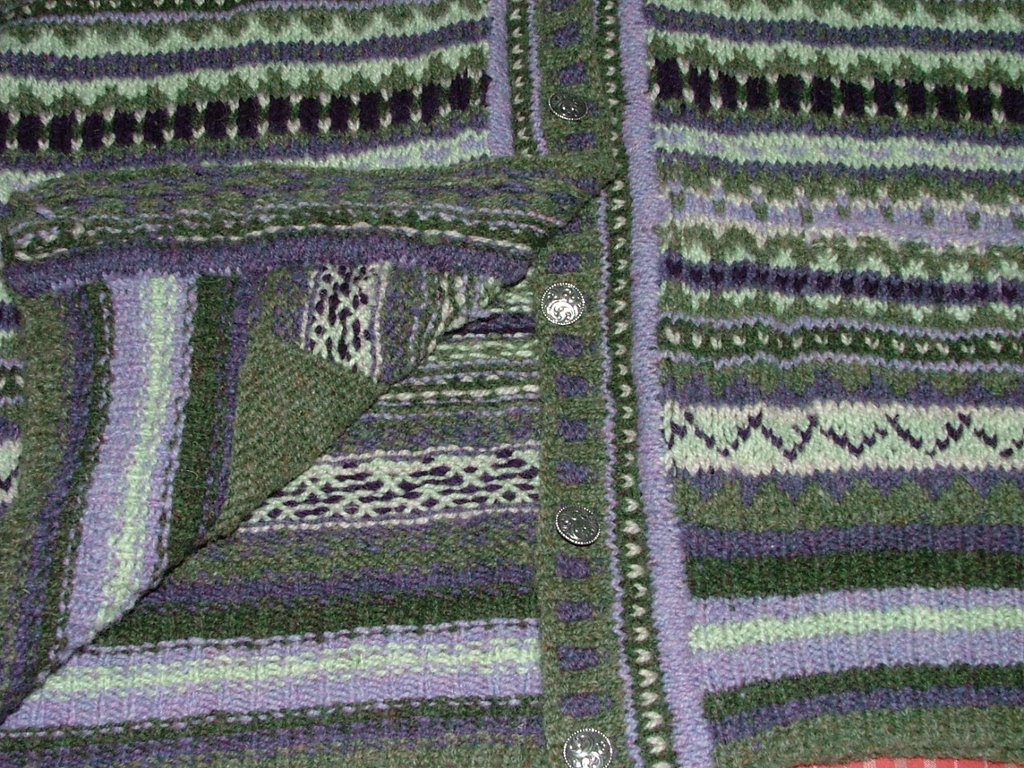
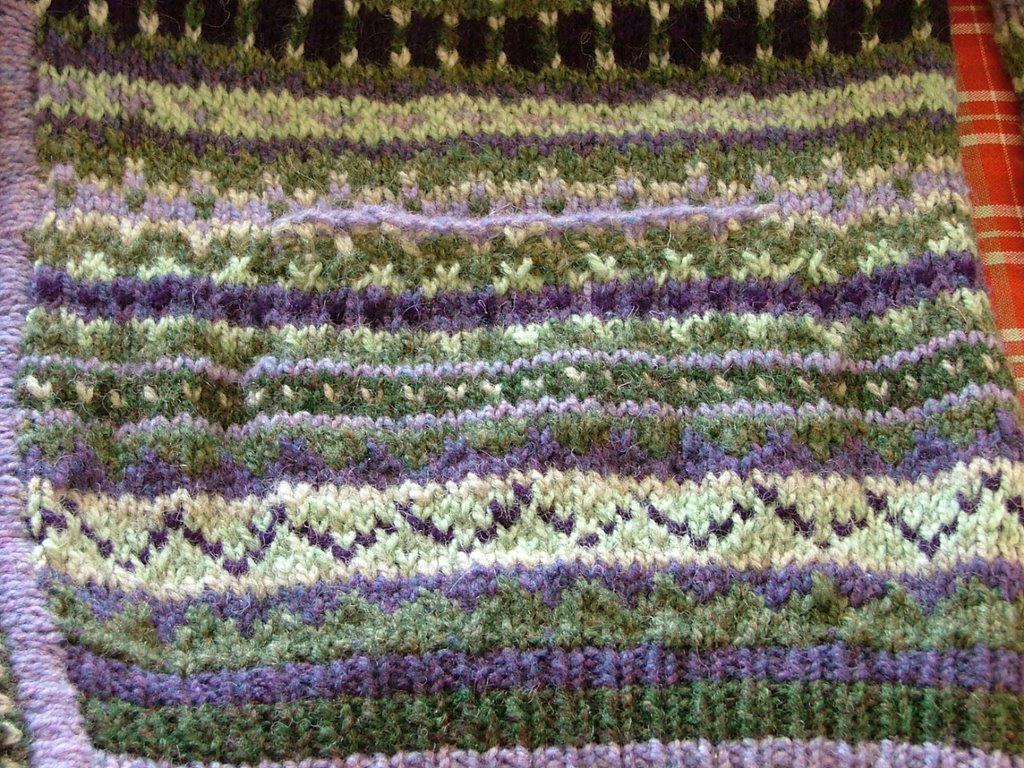
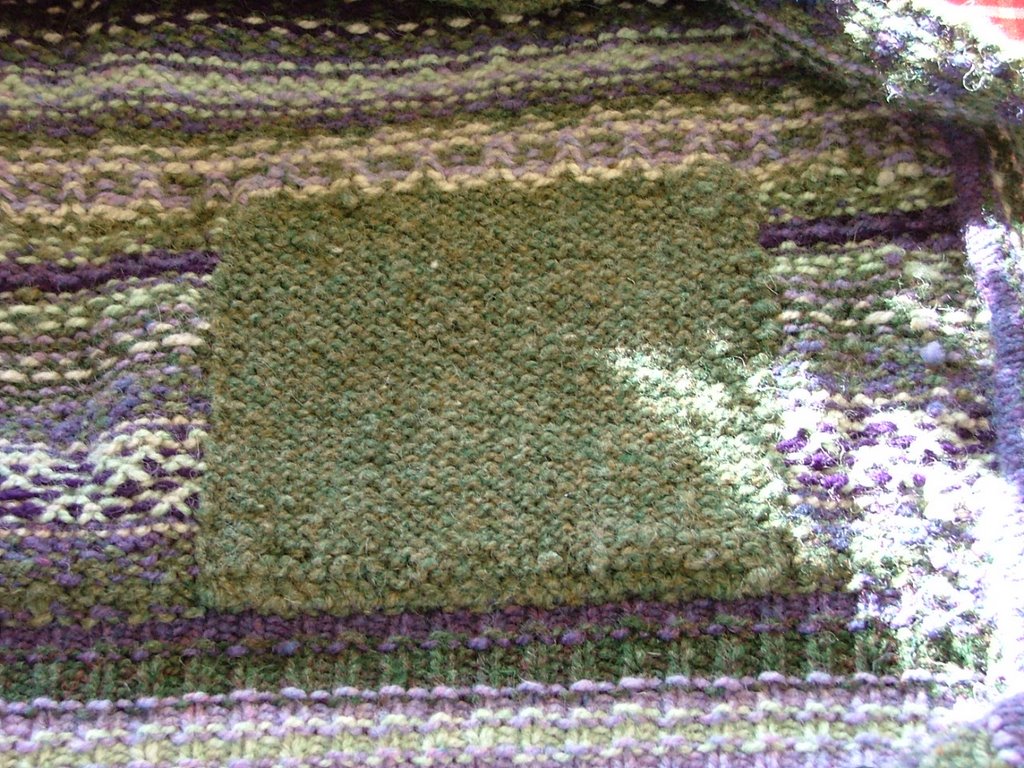
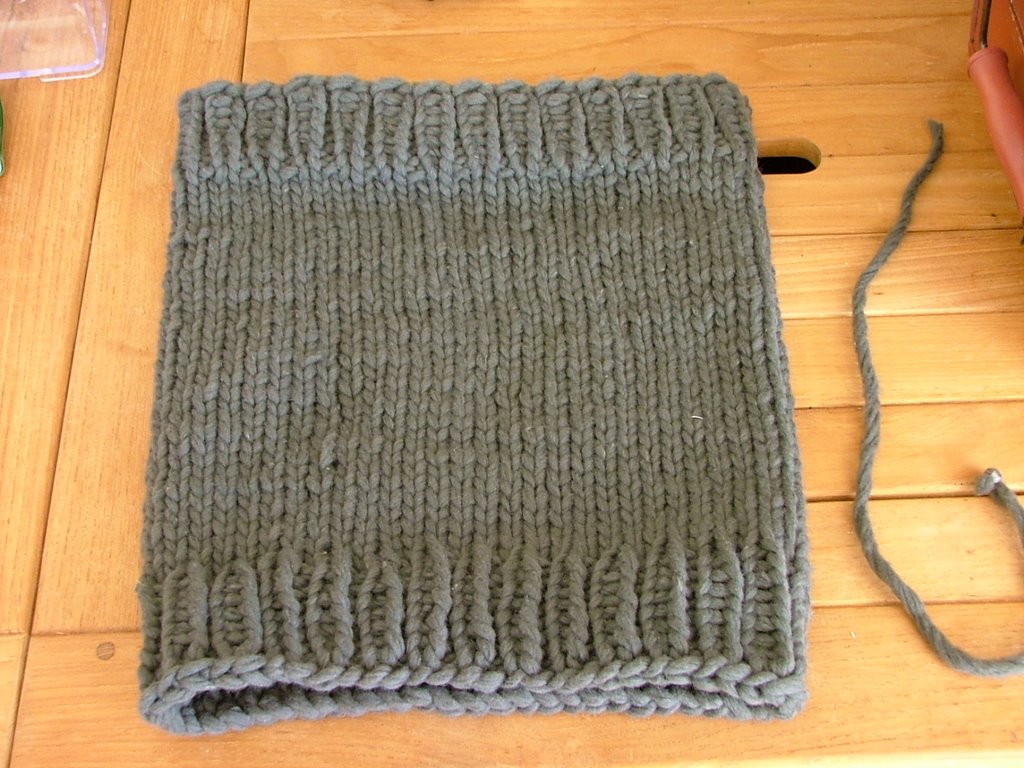
Yesterday, while waiting for people to come to our yard sale, I sat on the couch and listened to a book while I worked on finishing up a few last details on some projects. One of them was to finish that last lonely tier on my Argosy Scarf from the last Knitty. You may remember that this is the second of these that I have made, the first I made in Silk Garden (in all honesty I bought my yarn in haste before starting work one day, I really ought to have used Silk Garden Light), this second I made in SGL in the same colorway that the designer shows in the pattern. I am really pleased with the result and look forward to wearing it tirelessly. The pattern is very easy to follow and to keep track of once you get into the groove. Like most knitters I can never resist changing patterns and I did so here as well, changing her ssk's to k2tog's, and vice versa, so that they would lean away from their respective yo's. I really love all the color in this scarf, I'm finding that the older I get the more color I like to have around me.

ARGOSY

If you know much about Tucson, you probably know that once a year, for two weeks at the end of January and the beginning of February, our city hosts the world's largest Gem and Mineral show, with all the hotel rooms in town booked a year in advance, and many of the hotels acting as Gem Show venues as well. You can drive up and down the freeway and see hotel after hotel with big tents all set up for the show, as well as the Civic Center and pretty much any flat, empty stretch of dirt.

The Gem Show is our opportunity to buy jewelry and supplies as well as numerous other pretties at well below retail prices. Any woman in Tucson sporting jewels that were not bought at Gem Show prices is a fool. I make it a point of hitting it every year, and even DH loves to go and look around (probably in hopes of curtailing my spending, LOL). This year I am looking forward to taking my sister while she is here visiting. It is a GREAT place to buy your year's worth of b-day gifts for any women in the family. Walking into any venue is like walking into Ali Baba's cave with tables piled high with strands of pearls, cut and uncut semi-precious stones, finished jewelry, settings and findings, amber, silks, weavings, carved pieces, enormous geodes, salt crystal lamps...

So yesterday afternoon after we closed the yard sale DH decided that he wanted to go have a good wander around the show. With my asthma I am not the great wanderer that I used to be, and I have learned that sometimes it is good for him to be out on his own poking around and looking at things, he gets to go see things that we don't go to when we go together.

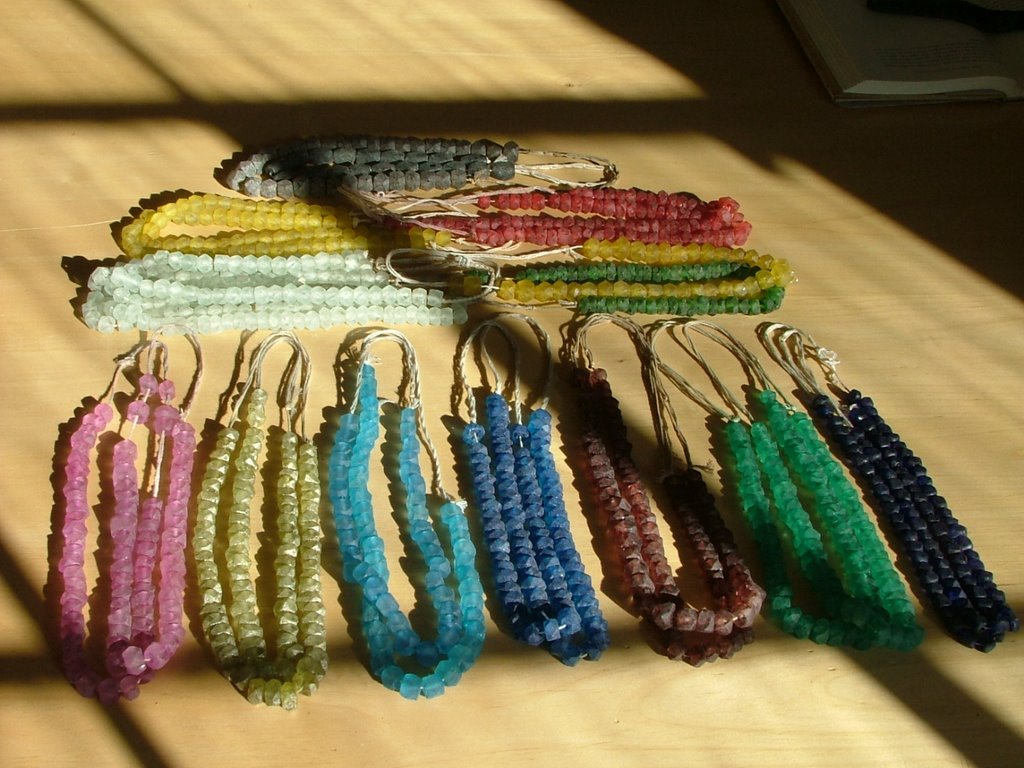
Not long after he got there he called me and told me that he had found a treasure trove of recycled glass beads in a whole lot of colors at $2.00 a strand. You may recall that I use these quite a lot in my knitting, especially in my felted bowls, and in fact I also used some in the Elements Shawl both in the body of the shawl and in the fringe that you see above. It is very hard to find colors other than blues and greens, and any of the other colors that one does find sell out fast - like the first day. The guy G found bought the whole lot off of another vendor the day before for a dollar a strand, and I know the second guy will sell out in no time as even at double the price these are a steal! I know that one of the local bead stores was selling these at about $12.50 a strand three years ago! So I asked G to get me two strands of any color he could find, about $50 worth in total, and look what he brought back for me!

WoooHoooo! Jackpot! I am delighted! These will last me well until next fall when the mini Gem Show comes to town.

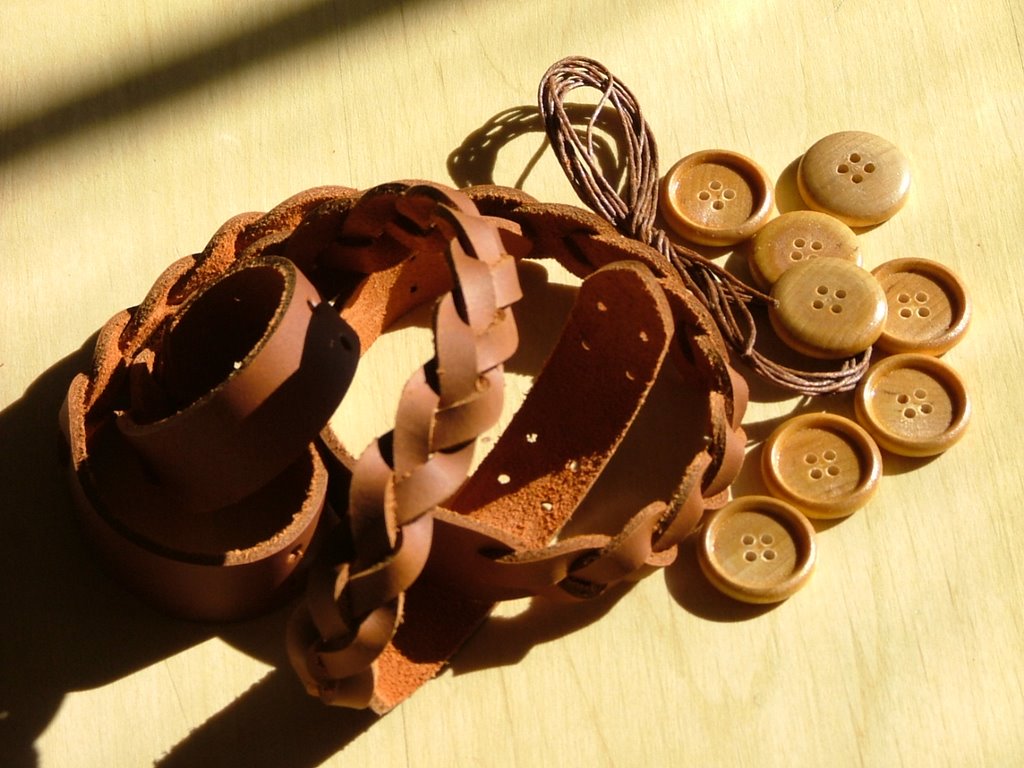
In the meantime the felted cable bag dilemma is fermenting in my mind and is almost resolved, and this morning I woke up with the answer to the fingerless mitts that I am designing as well. Those will show up here in the next couple of days, so be looking for them.

Enjoy your day-
Lynda

Friday, January 26, 2007

Felted Cable Purse

Dear Blog-

For a while now I have had this notion that I want to design a felted purse with cables. There is something about the idea of all that texture that I find really appealing. And I can see the bag in my mind's eye. In fact, I woke up one morning last fall with the whole bag already there in my brain, just needed writing out and knitting. But of course the holidays hit and all the best of intentions are downhill during that time.

I also bought these gorgeous braided leather bag handles from Homestead Heirlooms, and don't they just scream out to be on a cabled felted bag? I think they do.


So this week, in the time since I finished the PW CYO, I have been catching up on things. Today I will finish the Argosy scarf (having found something that will work for that lone last tier in my yarn cabinet), and I have been working on Emilie's Hooded Scarf from Green Mountain Spinnery in the evenings.

In the meantime, in between trying to give the house a good deep clean before my sister comes to visit next week (in the hopes that she will think that the house always looks like this), I am working on my swatches and charts for the bag.

I like this motif a lot, but it needs a bit more zip:


And zip-wise I know what I want to do. But I'll be danged if I can get my charting program to play nicely with me. I'm going to have to raid the grocery store this morning or else DH and I will have nothing to eat but some dry wheat sandwich bread and some margarine, but between cleaning bouts this afternoon, I will fight the good fight with the charting program and knit up my final couple of swatches so that I can felt them and then get moving on the design.

Meanwhile, back at the ranch, after my yarn cabinet vomited the other day I decided to put some of my yarn that I know I won't use on ebay. So if you like the yarn that I used on DH's Sakiori vest a couple of months back, please go here and here to look at my auctions.

I was completely convinced that my friend Susan was scheduled to come over and get waxed this morning, so I ran around the house early getting the place half-way picked up and taking my shower, etc. before she would get here. Sat down for a few minutes to catch my breath and realized that she was about 20 minutes late, which isn't like her. Hmmm... I started to dial her number and that was when it dawned on me that she is written down for tomorrow for her waxing, not today. Ok, then, time to go restock the larder.

If you would all click your needles together three times and chant, 'I hope Lynda gets the charting program to do what she wants, I hope Lynda gets the charting program to do what she wants, I hope Lynda gets the charting program to do what she wants', I would be most grateful.

Lynda

Wednesday, January 24, 2007

Blocking, and The Sleeves.

MY YARN CABINET VOMITED


BUT REMEMBER HOW GORGEOUS THE SNOW WAS ON MONDAY?

Dear Blog-

Although on one hand it would have made a great deal of sense to sew on the sleeves before taking on the neckline and button bands, on the other hand, leaving them til last gave me a LOT less bulk to deal with while I was working on the other sections. You know, there is only so much room in a chair, and I take up most of it. Those sleeves can wait their turn.

After finally finishing the button bands on Friday evening, I joyfully skipped over to the washing machine to begin blocking my sweater. I like to fill the washer tub (without the sweater in it) on a gentle cycle to a low water setting with a dash of Dawn dish liquid in it. First, because of asthma, I need to get rid of any vestiges of lanolin. Second, because of asthma, I can't use any of the wool washes that contain Essential Oils or other fragrances. After all, we had to close our Aromatherapy business because of my asthma. So a dash of Dawn it is. Once the machine has filled, I put the sweater in and let it swish for about 20-30 seconds. Then I open the machine again to stop the agitation, and set the kitchen timer for anywhere from 20-30 minutes to let the thing soak for a bit and relax. Somewhere I read that some wise person said that the whole point of blocking is to remind the yarn what you want it to do. Before you ca whip it into shape, it helps to weaken it's defenses.

After it soaks, I pull the sopping wet thing out of the machine, and set the machine cycle forward so that the soapy water spins out and the tub refills with clean water. Once it has done so, I put the sweater back in, and again let it agitate for about 20 seconds. Soak some more, then send it through the spin cycle. I pull out a nice, limp and amenable pile of knitting that is now ready to do anything I tell it to do.

In the meantime I have pulled my old blocking towels out of the linen closet and have them all set up on the dining room table, two layers deep, along with my blocking wires, yard stick and T-pins.

Now is my chance to mold it in to whatever shape I require. I like to start by loosely laying the sweater out on the towels and getting it into some sort of vague order, next taking out the blocking wires and setting them around on the sweater where I am going to use them. I like to run a wire along each area where I want a straight edge, such as hems, button bands, etc. Once I have strung these planes all through with the wires, I next measure between certain points to make sure that everything is even, say between the button band and the edge of the armhole on the right, then the same spot on the left, and make sure I come up with the same measurements on both sides. If I need it to be wider on one side, I can gently stretch the knitting on that side to fit. If I need it to be narrower I can gently massage the piece into place. Once it is the right measurement, I pin the wire down with my T-pins.

If I have cables I will use my fingers to gently lift the cables so that they show to the best advantage. With ribbing I will 'comb' the ribbing with my fingers to coax it into straight parallel lines.

Here is my sweater the next morning after drying overnight, with the wires still in to show where I have placed them.

You can see that I have a long wire going horizontally across the shoulders. Other horizontal planes are fixed in place with another long wire across the back of the hem, with two short wires on either side of the fronts at the hem, and two short wires at the tops of the pocket edges.

Vertical wires are at the side edges running from hem up into the armhole, through each of the light purple bands at the button bands, and at the edges of the button bands. Get it where you want it, and pin those puppies down until it dries.

Now I can deal with the armholes and sleeves. You've guessed by now that I don't want raw, cut edges to show anywhere in the finished garment. So again, after reading the great tips on the kidsknit.com website that I pointed you to yesterday, I went back and added 3 rows of purl (plus the 4th bind off row) to the tops of my sleeves. Do over? I would make it 5 rows and leave those stitches live on a piece of waste yarn as I did for the neckline.

Next, from the outside, I pinned and sewed my sleeves into place using mattress stitch, at the last knit row before I started the purl rows. After the sleeves were set in, I then turned the garment inside out and turned those purl rows to the inside and sewed them down as a facing over the cut edges and to the loops of my stitches that were formed when I mattress stitched the sleeves into the garment. Voila, no cut edges here, either.

INSIDE OF SLEEVE WHERE IT JOINS THE BODY

So there you go. All that was left was to sew on the buttons, and the beast was finished!


In the meantime, Dear Blog, I have been swatching away for a new bag pattern that I am working on. I am also one leeeetle square from finished on the second Argosy scarf. I could go back and rip it down one tier before starting my finishing tiers, but I don't wanna. The tail end of the yarn is a gorgeous turquoise and I don't want to lose an inch of it. This is why the yarn cabinet vomited. I stuck my hands down its throat looking for more Noro, and kind of Noro, with that color of turquoise, and I found some. Today I hope to finish out the Argosy and start on the new bag, writing the pattern as I work. Oh, and I'm also making Emilie's Hooded Scarf from Green Mountain Spinnery. But we'll talk about all that next time. The dirty dishes are calling.

Lynda

Tuesday, January 23, 2007

Button Bands!

Dear Blog-

It is another cold, frosty morning out there. You will need to be content with that bit of knowledge and not require photographic proof because it is too danged cold to go out there. Take my word for it, lots of heavy frost.

Ok, so yesterday when we left our sweater, we were here:

Shoulders finished with a three-needle bind off, neckline done and sewn into place inside, and the pockets finished. Time to move on to the button bands.

This was the stage that took me the longest to do, mostly because I wasn't entirely certain how I would finish the bands. As with steeks, take my advice and make these decisions before beginning your project. Had I done so I would have had several more options. And although I like my final result very much, more options are a good thing. Again I felt that the directions offered in the kit were not terribly detailed and helpful. Since I already knew I wanted to do something different this wasn't such an issue for me, but it might be for others.

I knew that I wanted to use the method of picking up sts from both sides of the cut edge in order to close in those cut ends. I knew I wanted to work a single peerie next as a decorative touch. But what the heck to do with the part where the buttons and buttonholes go?

I began with what I knew and dove in. Using the method described in the kidsknits.com Intro to Steeks and using the light lavender yarn, I picked up sts along the front edge on the outside of the garment's left side. Here is where the buttons will go, and this allows me to figure button placement before figuring buttonhole placement. Following her directions instead of following some cast-in-concrete magic formula for picking up sts, I picked up sts according to the st/row gauge I was getting in the fabric of the body tube, using a needle (US11) three times larger than was used in the knitting of the body (US8). For me this meant picking up 8 sts for every 9 rows of body fabric. Once I had picked up my sts, I then switched to the size 8 needle, and worked one purl row, then a knit row, making a total of 3 stockinette rows.

Next, from the inside of the edge using a second size 8 needle and the medium lavender yarn (same color combination I used in the neckline treatment), I picked up the loops created by the light lavender yarn when picking up for the outside of the garment, increasing one st to compensate for the fact that my light lavender loops were from the spaces between the outside picked-up sts, and so are one st short. I again purled one row and knitted the next, making for a total of three stockinette stitch rows.

Once these two sections are knitted, one needle full of inside sts and one needle full of outside sts are held together just as one would do when working a three-needle bind off, and are knitted together with a third needle - without binding off. Switching to the color of yarn used in the first row of my peerie, this joins the two sections - front and back - together and seals those cut yarn ends into their own little closed space. I then worked my peerie in dark green and white, finishing with the light lavender edge row.

The effect of knitting these two sections together over the cut edges also gives a raised line, what the originator of the idea calls a trapunto effect, and gives body and emphasis to the edge treatment.

So far so good, but what to do with the area where the buttons and buttonholes will go? It can't be worked in stockinette because it will be too light in weight and will curl. It can't be worked in stockinette and doubled under because that weight would be too heavy for the peerie next to it, and require a smaller needle which then changes gauge. It can't be worked in ribbing because I would have to switch down to a smaller needle here as well to make the ribbing look neater and that would also make a slight gauge change. It could be worked in garter or seed stitch, and yet those are used nowhere else in the garment. In the end I did decide to go with the corrugated ribbing in a 2x2 rib, using the medium green for the knits, and the medium lavender for the purls.

My first effort curled terribly and had to be ripped out. A little more research led me to work the last row and the bind off row in seed stitch. Problem solved. I have since seen another hint that changing the ribbing to a 2x3 rib also solves the curling problem.

After working that first side I took a good look at it again. I'm not keen on the fact that skipping every 9th st on the pick up does sometimes leave a tiny gap there. I continued on with the idea of perhaps throwing in a duplicate st in the light lavender in those spaces if needed, but since blocking I have found that the spaces mostly disappear. However I forestalled this on the second side by picking up in every row, and then decreasing on every 8th st. The decrease is slightly visible but a better solution to the issue. With lighter weight yarns and smaller needles this gap would not be as much of an problem, as the result would be that much more subtle.

I laid the sweater out flat and started playing with button placement on the corrugated ribbing band. Finally I decided that placing a button on every 5th purl area of the corrugated ribbing not only gave me a nice button placement, but made one heck of a handy way to know when to work the buttonholes on the second side. Since the corrugated ribbing was worked in four rows. I worked my two-stitch buttonholes in the second and third rows of the ribbing, finishing off with the two rows of seed st as on the first side.

Here is the final result, showing the light lavender band that picks up the outer edge of the cut steek, and the medium lavender band that closes those cut sts off from the inside. This technique makes for a very neat finish, and the result also makes my sweater different from other PW sweaters out there wandering in the world.


Time for breakfast. Tomorrow we deal with sleeves. Doesn't that sound exciting?

Lynda

Monday, January 22, 2007

What I Did With The Neckline


SNOW ON THE SANTA CATALINA MOUNTAINS

Dear Blog-

Look what happened to us last night! Yesterday afternoon at about 1:30 it started to rain, and continued to rain steadily all afternoon. Again, this is not our normal thing here in the desert, and it was a pleasure to sit on the couch all afternoon, reading and looking out the window. There were a few times when I swore the rain had a bit of substance to it. By evening it had gotten much colder, and I knew we were probably in for some snow. Before he went off to bed DH went out and gathered a snowball from my car windshield, we have it stored in the freezer so that we can prove that once again a blue moon has come around and we have had snow in the desert.

This morning when DH tried to go in to work at his usual time he found that all the bridges in our area across the Rillito River were closed because of ice, and so he came back home for breakfast, then left again once he could see that traffic was moving. He found it hard to believe that Tucson was so ill-prepared for ice, but as I told him, the last time I remember them closing the bridges for ice was 20 years ago, so it isn't something that happens often. On the other hand, with all the sand we have around here, you would think they could go spread some on the bridges. But he hasn't returned from his second try, so things must be moving again.

Last we left our story, I had cut open all my steeks and was resting on the couch, trying to slow my heartbeat and calm the nausea. The next day I decided to divide the remaining work on the sweater into units - the first being to bind off the shoulders together, finish the pocket edges and sew the pockets down, weave in pocket ends, pick up the neckband sts and work the neckband.

The sts at the top of the sweater were already divided front and back onto two needles, and so I now did a 3-needle BO to close the two shoulder seams. At the same time I bound off the remaining sts at the back neckline so that I would have a sturdier join there when I came back to work the neckband sts.

I had already knitted the pocket edges and that task was out of the way. The edges on one of the pockets was sewn down, the right pocket still remained to be sewn. I used a mattress st so that my seam would be as invisible as possible from the outside. Once that was done, I turned to the inside and pinned and sewed the pocket bottom and sides in place. To make life easier with less ends to weave in later, I first sewed down the pocket bottom to the top of the ribbing sts, leaving a long tail where I started. Then I sewed up the left side of the pocket and wove that end in. Next I picked up the long tail at the right bottom corner of the pocket and sewed the right side to the sweater, checking often to make sure that my sts were not showing on the public side of the sweater, and that there was no pulling or bunching happening in the fabric.

Outside view of pocket


Inside view of pocket

Here is my neckline template... Remember if you do this to allow for steek reinforcing and stitches being picked up, and don't go as deep as I did. About 1/2 to 3/4 of an inch less deep than your ideal would be best.


So my next task was to deal with the neckband. One of my concerns, aside from the aesthetics of the thing, was having those loose ends at the neckband where I had cut my steek open driving me crazy every time I wore the sweater. So I decided to work a doubled neckband, and did several rows in K1P1 rib to match the ribbing in other areas of the sweater. I did throw in a light lavender stripe, but that was about all the color-work I could face after working that whole danged sweater. I purled my turning row, and on the inside of the neckband I worked a darker purple stripe in the same place as the lighter stripe on the outside. Just for the heck of it. One of the women on the knitting list has in her sig line something to the effect of Life is short, wear pretty underwear. This, I think, would be the knitter's version of that sentiment.


Once I had sewn the neckband down on the inside, I had a lovely covered seam that doesn't show the cut steek or allow those ends to annoy one. The idea here is to move your live neckband sts to a piece of waste yarn - and without binding them off - sew them one by one to the inside of the loops where you picked up sts for your neckband. This gives a nice, stretchy neckband.

Look at the inside of that baby! Isn't it just as lovely as the outside?

Ok, Blog, time to dive into my day. I am so glad I don't have to go anywhere this morning! What a wimp I've become after living here for 25 years!

Lynda

Sunday, January 21, 2007

Steeking my Philosopher's Wool Colour Your Own

Dear Blog-

A few days ago DH asked me if I had written to Blog lately, and I had to confess that I hadn't. I was too busy knitting and trying to finish my CYO before our guild meeting on Thursday. While I wasn't able to reach that goal - tho it was a danged cold morning that day and I sure could have put it to good use - it managed to spur me on to the point where I was so near to finishing it that I was done with the thing two days later. Yesterday, in fact. So I thought I would tell you day-by-day what I would have said had I been here.

Sunday - during and after our yard sale - I was knitting like a fiend, with the end of the body tube in sight. By afternoon I had finished the body tube and was ready to start steeking. I may have mentioned here before that I had a few issues with the PW pattern, and certainly the steek instructions fall into that category. But just for the heck of it I will tell you all my issues so far. I bought this kit a year ago at a workshop that Ann and Eugene from PW gave here in Tucson. I loved them, loved their way of doing business, and that hasn't changed. I also have their book 'Fair Isle Sweaters Simplified' and it gives a fair over-view of how they got started in the business, and also includes several of their patterns, with more detailed instructions than one gets in the kit, so if you are planning on working on one of their kits, get the book while you are at it.

My issues were that the shaping of the sweaters, IMNSVHO, is out of date. They have tighter ribbing at the bottom, a very ballooned-out sweater body, and then sleeves that are so long that they hang down over the cuff ribbing. All these were no problem at all to adjust, one just has to be aware that one needs to adjust them. I did, in fact, pretty early on in knitting the sweater body, have to rip out the thing and cast on again with more sts as I realized that the ribbing at the bottom was going to be way too tight. I refigured the ribbing sts at 80% of the body sts and started again. Because of the treatment I did at the button bands this worked out great, but if you are doing a simpler button band, do consider refiguring your ribbing sts at 90% of the body total. They also have as their ideal 16" of ease in the body. This, to me, is waaay too baggy and makes for an ill-fitting sweater, so again, take that into consideration when looking at your gauge and the pattern photos.

However, having adjusted these numbers to suit my taste, it was no problem making the sweater body. I find that the two-handed fair isle technique that they use is really rather easy to do. I have used it before, but in smaller projects, and I wasn't disappointed on this larger project. It knits up much faster than you would think - I started this on Xmas weekend.

In their instructions, they also advise you to have the start of your round placed at the side in the underarm area. Since I was planning a cardi, I moved my beginning of the round to the front steek area and this way I could get my rounds to move without the jump you get when knitting in the round with a pattern. I also added one extra stitch so that the pattern could mirror-image on either side of the steek. Little things like that are important to my eye and bug me when they don't match. Yes, I am the person who goes into other people's houses and adjusts the pictures that aren't hanging straight on the wall. When they aren't looking, of course.

Here is my finished body tube pre-steeking:


Now then, where I made my mistake was in not researching steeking methods before starting the sweater. PW instructions direct you to cast on a single extra stitch to use as your steek. And this is what I did. It wasn't til I was near finishing the tube body that I started looking into steeking methods more thoroughly and realized the error of my ways. The best instructions that I found were here at the kidsknits website. Next time I do this I will cast on a 5 - 7 stitch steek for more playing room. On the other hand, had I done that here I would have run out of two colors of my yarn, so take that into consideration, too. I know you can get extra yarn by contacting PW. Another woman who bought a kit at the same workshop where I got mine tells me that she did run out of a couple of colors and was able to get more that way.

I debated long and hard on the wisdom of crocheted steeks vs. machine sewn steeks. There is such an elegance about the idea of a crocheted steek, like with like, and all that. Then there is the security of using the machine sewn method and knowing that beast isn't going to move. Since I decided in the end that I would use the kidsknits method of finishing my front bands, I went with the machine sewn steek. And I am glad I did. The same woman who ran out of yarn also used a crocheted steek, and she tells me that that her edges are not holding, and that she is waiting til she buys a sewing machine to secure her steeks that way before moving on.

Of course I have listened to the conversation over the years on the knitting lists about cutting your steeks and how scary that is. There is almost always mention of EZ's advice to take strong drink before and lay down in a dark room after. What a bunch of wimps, I thought. You know knitters have done this for hundreds of years at the least, and it works for them, why wouldn't you feel confident that it will work for you?

Well, let me tell you, sisters, they are right and more. I was nauseous the entire time I was sewing my steek reinforcements at the sewing machine. I was actually recalling awful memories from my childhood as I was sitting there sewing. Where the heck they came from, I don't know but they reared their heads as I sewed on my two weeks' worth of knitting in a state of terror and total lack of confidence.

I also had to figure out how to cut the area for my neckline, and what I did, I think, is pretty ingenious. After transferring my sts to two needles for front and back sts, I laid my piece flat on the table and counted out my stitches in thirds on the front. One third for one shoulder, the next third for the neckline, and the final third for the second shoulder. I placed markers at these points (and did the same for the back, to be used later). After making very sure that everything was laying flat, I then measure the distance across the neckline between the two center markers. It measured out to 9.5 inches. Ok, then I went to a piece of blank printer paper and measured a line 9.5 inches long, with a mark at the center at 4.25 inches. From that mark I measured 3.5 inches straight down in a perpendicular line. Next time I might go for a 3 inch deep neckline instead. Next I drew an arc from one end of the 9.5 inch line, down to the center point depth marking and back to the other end of the 9.5 inch line. And cut this out of the paper, using the piece I made as a pattern piece would be in sewing. I pinned it to the sweater body in the center, and basted around it in contrasting embroidery thread. This line is where I then sewed my neckline steek reinforcing stitches on the machine. Again, because I wasn't allowing for the finishing of edges in my calculations here, I would go for a less deep neckline next time, but other than that it worked perfectly and gave me a nice even neckline in the front.

Then I sat down at the dining room table with my big ol' fabric sheers and cut that puppy open at front and armholes.

Here we are with all the steeks cut open.


After doing all this I felt like I just couldn't look at knitting again for the rest of the day, so I set it all down and spent the evening reading and watching tv on the couch.

Next time I'll talk about finishing off the shoulders with a bind-off, and working the neck band.


Lynda


Thursday, January 11, 2007

Dear Blog-

I wrote the following two days ago, and blogger decided it was so full of yummy goodness that it wanted to EAT my post rather than, well, post it. All I was able to recover was about 1/3 of the original. This made me so very annoyed with blogger that I couldn't bear to even look at the thing yesterday. So this morning I will work to replace was what eaten.

It is a very dark morning out there today. I couldn't get back to sleep after my husband left for work this morning, so I finally gave up and turned on my light to read in bed. I was surprised when I did get up and open the curtains that it was dark out there. We are supposed to have rain for the next three days and so it is rather cloudy this morning, but in the desert rain is never a given when it is predicted. We shall see. My asthma, which has not been behaving itself this winter nearly as well as it did last winter, has been especially nasty these past two weeks and I am just praying for a reprieve. It annoys me on so many levels - I have not accepted this asthma gracefully, it still really, really ticks me off that it has happened to me - and I think, If I can get this bad without even having a pet, then heck, I may as well have a cat. Because the only, only consolation for not having a cat was that at least I could breathe easier.

Ok, whining won't help (but thanks for letting me whine anyway), I'll go ahead and finish the following bit and then post it.


Dear Blog-

I know I haven't been here in a while, but I've been BUSY! Mostly with knitting. It is really hard to drag oneself away when the needles are flying and you are just humming along with a project. But I haven't forgotten that I promised you my applesauce bread recipe, and also a free pattern. I haven't got the pattern all set yet, but I can certainly put the recipe in here before I close.

Last Friday afternoon I returned home from a morning of playing Kit Dr. at the shop, and what to my wondering eyes should appear but a box from Morehouse Farms! Yipeeeeee! With my remaining Xmas money from husband and sister and her partner I ordered some things.

First there was the skein of bulky in olive that I wanted to make a cowl with like the one my sister has made herself. The pattern she used calls for knitting it in stockinette, so as you might guess, Friday afternoon I gassed up the needles and had to sit right down and knit the cowl up. Then I decided I really didn't like the typical stockinette curl at the edges, and that it might be better with some ribbing at the edges. As you can imagine, Saturday afternoon I ripped it all out, and then reknitted it with ribbing at beginning and end. I'm still not completely convinced that this is the end result, but it certainly is functional in either of it's incarnations. It may yet have a different stitch pattern before too much longer. Look at how thick the yarn is!


But Ohhhhhhhhhh! This yarn! It is like heaven spun into strands. Poofy clouds made into yarn. It is lovely stuff, so soft. I decided this year I would knit fewer projects, but that they would be more major in scale, and that they were going to be with really, really nice yarn, not just nice yarn or darned nice yarn. So with that in mind I also ordered their color sample book...


While I have been at their shop at every opportunity, it is next to impossible to remember all the colors clearly when you are on the other side of the country. I have already decided which color I will choose for a project from Louisa Harding's Winter Muse Collection, but before I get to that, I can knit THIS...

Yes, I have finally indulged myself with their Algonquin Cardigan KnitKit in natural chocolate brown. Can't you just see how gorgeous that is going to be? I can barely keep myself from wanting to start it right away. Luckily for me I am just short of where I will begin my armhole steek in my PW CYO. Look!


Those lavender lines you can see towards the top of my knitting are the pocket edges. The pocket edges on the right side of the sweater as you look at it are already sewn down and hardly visible, IMHO. The ones on the left are just tacked down for the moment with stitch holders. And I want applause here, because I worked that pocket edging in: two handed fair isle, knitting backwards on return rows, in 1x1 rib. And they look mahvelous, dahling.

I did break into something of a cold sweat because someone was telling me she doesn't think a crocheted steek works well with anything less than a 9 stitch steek, and I used a single stitch steek because that is what the pattern tells you to do. Tho they machine stitch their steeks. I'd rather not machine stitch mine, but time will tell. I checked out what Eunny Jang says about various steek methods on her blog, but my God, she uses these wide, elaborate steeks in her work! Paved six-lane highways of steekiness! Well, we shall see, somehow it all works out.

In the meantime - Applesauce bread!

1/2 C shortening or unsalted better
1 1/2 C sugar
2 beaten eggs
2 C applesauce
2 C flour
1/4 t salt
1 t baking powder
1/2 t baking soda
1 t cinnamon
1/2 t each of nutmeg, gloves, allspice, ginger
1 C raisins
1/2 C walnuts
2 med Granny Smith apples, peeled, cored, chopped into chunks

Preheat oven to 350 and butter and sugar two standard loaf pans. Cream shortening and sugar, add eggs and beat well. Add applesauce and blend, then add dry ingredients and blend well. Beat until smooth and then fold in raisins, nuts and apples. Pour into loaf pans and bake 1 1/2 - 2 hours, or until cake tester comes out clean.


Web Counter
Web Counters